A great way to personalize your clothing items and make them more special is to print your own graphics on them.
You could print personalized graphics or images onto clothes as a gift for someone, for any special events, or yourself as a unique fashion item.

Most of the tools you need to get this job done are widely available except for transfer paper. While they are available in some craft and general stores, these are not always in stock or sold in all branches.
So how to transfer a picture onto fabric without transfer paper?
No need to fret, you can get great quality prints without using this one item. Here are a few ways that work just as well.
Table of Contents
- Can You Transfer a Picture Onto Fabric Without Transfer Paper?
- How to Put a Picture on a Shirt without Transfer Paper?
- How to Print on Fabric Using Freezer Paper?
- How to Print on Fabric Using Gel Medium?
- How to Transfer a Picture onto Fabric Without Transfer Paper?
- How to Put a Picture on a Shirt with Plastic Wrap?
- Final Words
Can You Transfer a Picture Onto Fabric Without Transfer Paper?
Yes, it is possible to transfer a picture onto fabric without using transfer paper, although the results may not be as precise or long-lasting.
One common method is using an inkjet printer to print the image onto regular printer paper, then applying a medium like gel medium, Mod Podge, or even a mixture of equal parts white glue and water onto the fabric. Press the paper with the image face-down onto the fabric and allow it to dry.
Once dry, you can gently rub the paper to reveal the transferred image. While this method can work for some projects, transfer paper is generally recommended for more reliable and high-quality results.
How to Put a Picture on a Shirt without Transfer Paper?
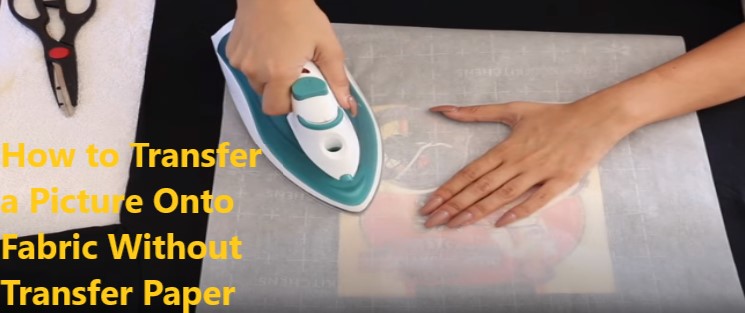
If you don’t have access to transfer paper, there are two other ways you could follow to transfer paper onto fabric and shirts at home.
The first method is using freezer paper.
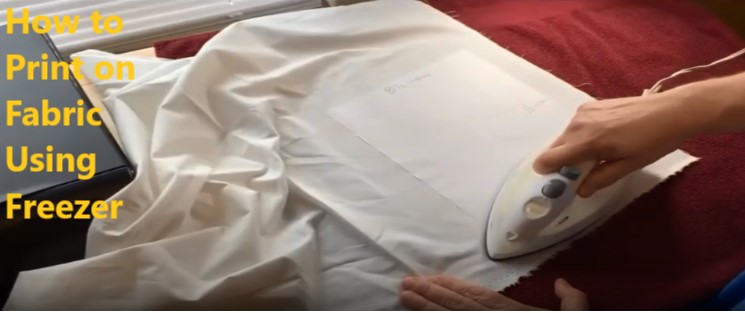
How to Print on Fabric Using Freezer Paper?
Freezer wrappers or papers are plastic-coated paper that you use to freeze and store food. One side of the paper has a plastic coating, while the other side is just normal paper.
You can use the paper to print images directly on to fabric. The process works as the paper only has wax or plastic on one side. It’s a regular paper on the other side.

Therefore, you can print on the material with ease. Laserjet printers work well with this process. If you have an inkjet printer, you might need more aid such as vinegar or special kinds of ink for the method to work. When using inkjet printers, make sure you go through a few practice prints before you print on the main fabric.
This is how you would use freezer paper to print on fabric:
Step 1: Cut the Paper
Cut the freezer paper according to the size of the design you have. For higher quality prints, cut the paper into an 8 ½ x 11-inch size. You can use card stock paper as a template to cut the paper into perfection.
Step 2: Iron on the Paper
Place the waxy side of the freezer paper onto the fabric and press with an iron.
The wax will melt and attach itself to the fabric. Control the temperature so that the paper does not burn.
Step 3: Start Printing
Now enter the fabric through the printer, and your image will be copied on the paper.
Before the final print, run a test on another paper to check if the orientation is correct. Also, put your printer on the photo print option.
Step 4: Seal the Print
The design has now been printed onto the paper. But this is not a durable print. Paper will easily melt with water or sweat. To seal the deal, you need a water-protected layer.
Add this layer with the help of a sealant spray. You can get special water protective sprays for fabric and shoes. Adding a water protective mod podge could also work for a while.
How to Print on Fabric Using Gel Medium?
Gel medium is usually used to thicken paint. The product also comes in handy as an adhesive.

Follow these steps to know how to print on fabric with gel medium.
Step 1: Get a Paper Print
If you have a design selected, print it on paper. Any regular kind of paper will do. Flip the image when printing if it has texts or numbers.
You could also print movie tickets, postcards, stamps, or anything special to you onto fabric. To do this, you will have to photocopy the material onto paper.
Step 2: Add Gel Medium Coating
Take a generous amount of the gel medium and coat your print. The coating needs to be thick. Cover all the edges of the paper.
Step 3: Press
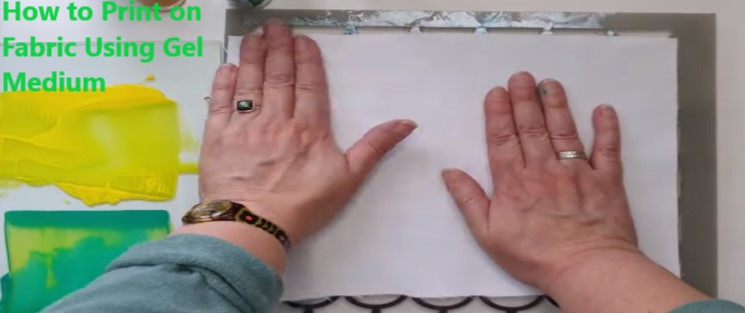
Put the paper face down on the fabric. The paper should lie flat on the fabric. When printing on a shirt, make sure you avoid the collars or any pockets that might get in the way. Use a heavy object like a stack of books to weigh down and press the paper onto the fabric.
Step 4: Let Dry
Before moving on to the next step, let the gel medium dry completely. Do not remove the weights added on top, and do not peel the paper.
Doing this will ruin your shirt or fabric. You’ll have to start over again.
Step 5: Wet the Paper and Rub
If you are sure that the gel medium has dried completely, you can move on to the next step.
Using a wet sponge, wet the paper. A spray bottle will also work.
Applying gentle pressure, try and rub off the paper from the fabric. You will see that that paper comes off, but the print doesn’t.
If you have printed stuff on wood using mod podge before, you might know how the method works.
Try and avoid the edges at first, start from the middle.
Remember not to rub too hard. Doing that might cause the print to come off as well.
Reapply water and rub again as needed. You might need two or three sessions of this process to get all the paper off.
Step 6: Let Fabric Dry
After you’ve gotten rid of all the paper crumps, you can let the cloth air dry. Leave the fabric under the sun if possible for a quicker dry time.
Read Next:
How to Transfer a Picture onto Fabric Without Transfer Paper?
There are many ways to get the same quality print on fabric without transfer paper. A fun way to get prints or to transfer pictures onto fabric at home is by using the sun printing method.
It’s an eco-friendly and fun method that you can try as an activity with kids as well. You need a special blueprint or cyanotype fabric for the method to work.
Keep in mind that the prints come in a lighter color than the fabric that has been chosen. So if you use a dark grey cloth, the print will be white. You can’t use the method for color prints.
All the steps you need to follow are:
Step 1: Print on Transparency Sheet
Inkjet papers allow you to print stuff on transparency paper. Select the image you want on your fabric and work out a negative version of it. Then using an inkjet printer, print the image according to your desired size.
Step 2: Place on Fabric And Press
Now take the paper and place it on the special sun printing fabric. Get the size and alignment right before you start pressing.
To press the paper with the fabric using a glass block that does not block UV rays. You could use any material that is heavy but won’t block the UV rays.
Sunlight needs to seep through the object and get in contact with the fabric for a good quality print.
Place under direct sunlight outdoors for the greatest outcome.
Step 3: Let Sit and You’re Done
Using a glass weight allows you to see the progress, so you know how long to wait. But if you can’t see through the object, you should know that prints on sun printing fabric appear within 15 to 20 minutes. The waiting time is not that long.
After the print appears, your cloth is ready to be worn.
How to Put a Picture on a Shirt with Plastic Wrap?

If you want to print things on a shirt in a jiffy, a great hack to follow the plastic wrap method. I know it sounds crazy, but the hack works! It might not be of the greatest quality, and it might come off in the washer. But it’s a great tip to follow if you have no other options left.
What You Will Need
Before you start printing, gather all your appliances. This will help you work faster. Here is a list of all the things that you will need.
- A sharp pair of scissors
- A printed out graphic
- Iron
- A clean plain fabric or shirt
- Parchment paper
- Plastic wrap
After the material has been collected, follow the steps below to get the print on your fabric.
Step 1: Print Your Design
Choose any design you like and print it on paper. Make sure to get the size correct. If the print is too small, you won’t be able to see it. And if the design is too large, it won’t fit on the fabric or shirt,
Step 2: Cut Out the Graphic
Firstly you need to cut out the design that you want on your fabric. You can use a sharp pair of scissors to do this. If the design has straight edges, you could also use a paper cutter.
Step 3: Wrap in Plastic Wrap
Now wrap the cutout design in plastic wrap. Make sure you get all the edges covered. Wrap and fold the corners backward so that no water can seep through.
Step 4: Place the Design and Parchment paper
Position the paper on your fabric. Ensure that it is placed exactly where you want it and is centered.
Then get some parchment paper and place it on top of the cutout.
Step 5: Iron and You’re Done
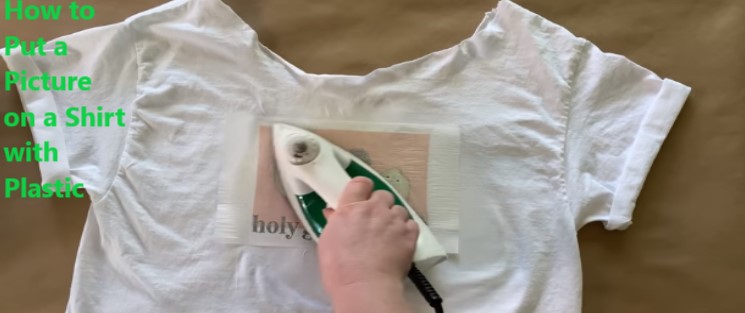
Get iron and start ironing over the parchment paper.
The parchment paper keeps the plastic wrap from melting and clinging to your iron.
On high heat, the plastic wrap will melt into the cloth.
Once you feel like the plastic wrap has melted completely, take off the iron and check the print. If you are not able to scratch off the plastic from the fabric, your printing has been successful. Your clothing is now ready to wear.
Be careful when washing this piece of clothing as the plastic might slip off.
Final Words
Now you know about the right way to transfer a picture onto fabric without transfer paper; you can print fabrics at home on your own.
As you can see, there are a lot of options that you can use. Printing any sort of design on fabric has become quite easy now.
Make sure to use the right method with the fabric at hand, and you’ll get proper prints without ruining your clothes.
Print on your clothes at the comfort of your home and rock that custom design!
