
To reupholster a recliner, start by removing the old fabric and padding. Then, cut the new fabric to size and staple it onto the frame, followed by adding new padding and attaching it securely.
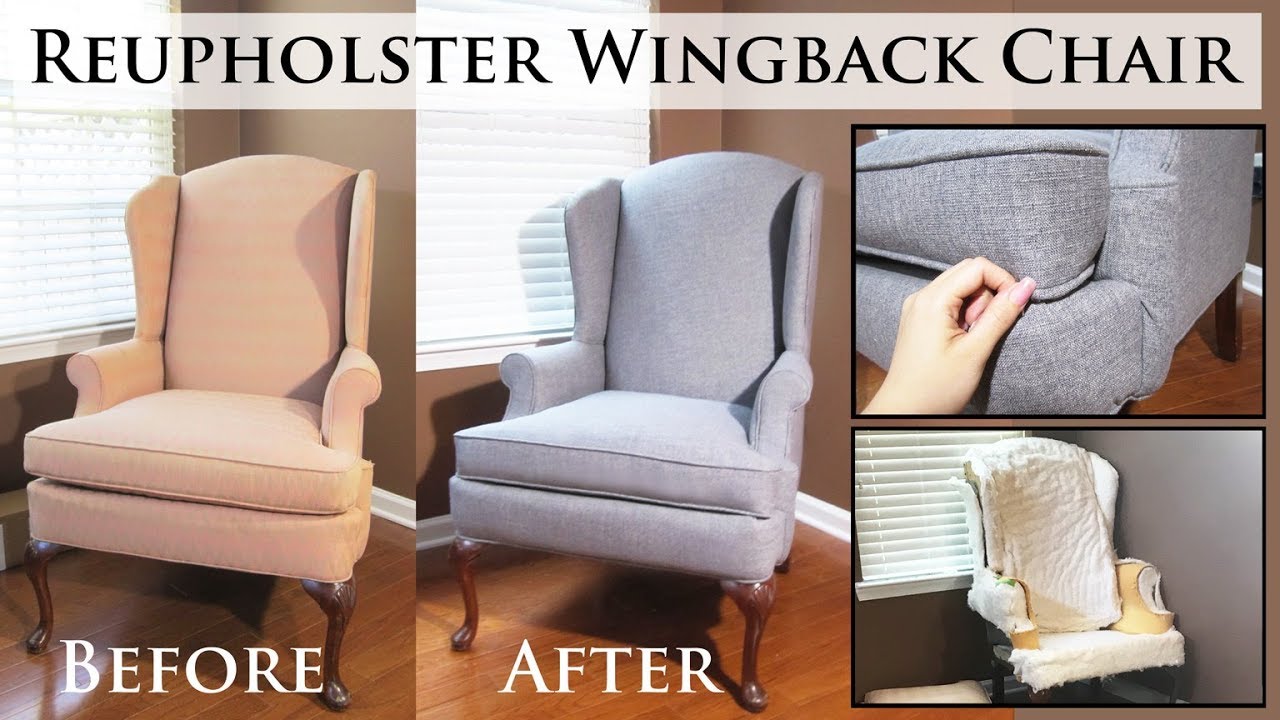
Recliners can provide a comfortable and relaxing place to unwind, but over time, the upholstery might become worn, torn, or outdated. Reupholstering a recliner can give it a fresh and new look without the need for a complete replacement. By following a few steps, you can update the fabric and padding of your recliner to match your evolving style preferences or to restore its original charm.
In this guide, you’ll learn the essential steps to reupholster a recliner and transform it into a stylish and inviting piece of furniture.

Credit: www.pinterest.com
Table of Contents
Getting Started
Learn how to reupholster a recliner with our step-by-step guide. Transform your old recliner into a stylish piece with a few simple tools and materials. Save money and give your furniture a fresh look with this easy DIY project.
Reupholstering a recliner is a great way to breathe new life into an old piece of furniture. Whether you want to update the look or simply give it a fresh and clean appearance, reupholstering can be a rewarding and cost-effective DIY project. Before you dive in, however, it’s important to get started on the right foot. Here are a few crucial steps to keep in mind:
Choosing The Right Fabric
When it comes to reupholstering a recliner, choosing the right fabric is essential. Not only do you want a fabric that matches your personal style and complements your home décor, but you also need one that is durable and easy to maintain. Consider factors like color, texture, and pattern to find the perfect fabric for your recliner.
It’s worth noting that different fabrics have different levels of durability and maintenance requirements. For example, leather is known for its durability and easy cleaning, while linen may require more delicate care. Take the time to research and select a fabric that suits your needs and lifestyle.
Gathering The Necessary Tools And Materials
Before you start reupholstering, make sure you have all the necessary tools and materials at hand. This will save you time and prevent frustration down the line. Here’s a list of the essential items you’ll need:
| Tools | Materials |
|---|---|
| Nail puller | Upholstery fabric |
| Staple remover | Padding |
| Needle-nose pliers | Webbing |
| Scissors | Upholstery thread |
| Staple gun | Tack strips |
| Tack hammer | Upholstery pins |
It’s important to gather all these tools and materials before you begin your project. Having everything ready will ensure a smooth and efficient reupholstering process.
Now that you know how to get started on reupholstering your recliner, you’re ready to tackle this DIY project. Stay tuned for the next steps to transform your recliner into a comfortable and stylish piece of furniture for years to come.
Preparing The Recliner
Preparing the recliner for reupholstering is an essential first step to ensure a successful and satisfying project. Properly preparing the recliner will not only make the process easier but also ensure the final outcome is of high quality and durability. In this section, we will cover the necessary steps to prepare the recliner, including removing the existing upholstery and assessing the frame and padding.
Removing The Existing Upholstery
To begin the reupholstering process, the existing fabric or leather upholstery needs to be carefully removed. This involves taking apart the recliner and removing any staples, tacks, or fasteners holding the old upholstery in place. Use a staple remover tool to carefully detach the old fabric from the frame, ensuring that all the old material is completely removed.
Assessing The Frame And Padding
Once the old upholstery is removed, it’s important to assess the condition of the recliner’s frame and padding. Check for any signs of damage or wear, such as broken springs, sagging padding, or loose frame components. Ensure that the frame is sturdy and undamaged and that the padding is in good condition. Any necessary repairs or replacements should be addressed at this stage to ensure a solid foundation for the new upholstery.
Measuring And Cutting The Fabric
When it comes to reupholstering a recliner, one of the crucial steps is Measuring and Cutting the Fabric. Accurate measurements and precise cutting ensure a professional-looking finish.
Taking Accurate Measurements
- Use a measuring tape to measure the length and width of the recliner cushions.
- Add a few inches to each measurement for seam allowances and fabric tucking.
- Double-check your measurements to avoid cutting the fabric too short.
Cutting The Fabric
- Place the fabric on a flat surface and use fabric chalk to mark the measurements.
- Use fabric scissors to cut along the marked lines carefully.
- Trim any excess fabric to ensure a clean and neat edge.
Credit: m.youtube.com
Attaching The New Upholstery
Attaching the new upholstery to your recliner is the final step in the reupholstering process. This step will give your recliner a fresh, new look and ensure everything is secure and in place.
Securing The Fabric To The Frame
Start by aligning the fabric meticulously, ensuring it is smooth and wrinkle-free. Use a staple gun to secure the fabric to the frame at key points, such as the bottom, back, and sides.
Apply tension to the fabric as you go along, ensuring a neat and snug fit. Keep the fabric taut to prevent sagging and bunching.
Making Smooth Corners And Tucks
To achieve smooth corners, make small folds and tucks in the fabric, ensuring they are even and tight. Pull the fabric firmly and staple it in place, creating crisp, professional-looking corners. Secure any excess fabric to the underside of the recliner to maintain a polished appearance.
Adding Finishing Touches
If you’ve successfully reupholstered your recliner, it’s time to put the finishing touches on your project. Adding these final details can truly elevate the appearance of your recliner and give it that professional, polished look. In this section, we will discuss two important aspects of adding finishing touches to your reupholstered recliner: replacing any trim or buttons and cleaning and polishing your recliner to make it shine. Let’s dive in!
Replacing Any Trim Or Buttons
Replacing worn-out or damaged trim and buttons is an easy and effective way to enhance the overall look of your recliner. Here’s how you can go about it:
- First, carefully remove any old trim or buttons from the recliner using a small pair of pliers or a staple remover.
- Inspect the fabric and foam beneath the removed trim or buttons to ensure they are in good condition. If necessary, make any repairs or replacements.
- Next, choose new trim and buttons that complement the design and color of your recliner. There are various types of trim available, such as braided gimp or decorative nailheads, so pick the one that suits your style.
- Using a fabric glue or a staple gun, attach the new trim along the edges of the recliner, making sure it is straight and secure. If you’re adding buttons, position them evenly across the backrest or seat cushion and secure them tightly.
- Finally, allow the glue to dry completely before using your reupholstered recliner.
Cleaning And Polishing The Reupholstered Recliner
Once you’ve added new trim and buttons, it’s crucial to give your reupholstered recliner a thorough cleaning and polishing. Follow these steps to ensure it looks its best:
- Start by vacuuming the recliner to remove any dust, dirt, or debris that may have accumulated during the reupholstering process.
- For fabric upholstery, gently spot clean any stains or spills using a mild detergent mixed with warm water. Use a soft cloth or sponge to dab the solution onto the affected areas, taking care not to saturate the fabric.
- For leather or vinyl upholstery, use a specialized cleaner recommended by the manufacturer. Apply the cleaner onto a clean cloth and gently wipe the surface, removing any dirt or stains.
- Once the recliner is clean, allow it to air dry completely.
- To enhance the shine of leather or vinyl upholstery, apply a leather conditioner or polish using a clean, lint-free cloth. Follow the instructions provided by the product manufacturer for best results.
- For fabric upholstery, you can use a fabric freshener or upholstery spray to give it a pleasant scent.
By replacing any trim or buttons and giving your reupholstered recliner a thorough cleaning and polishing, you’ll be amazed at the difference these finishing touches can make. Your recliner will now look and feel like new, ready to provide you with comfort and style for years to come.
Troubleshooting Tips
Discover effective troubleshooting tips for reupholstering a recliner. Follow step-by-step instructions to revamp your recliner like a pro. Upgrade your furniture with these simple yet impactful DIY techniques.
Dealing With Wrinkles Or Bunching
If you notice wrinkles or bunching in the fabric after reupholstering your recliner, don’t panic! This is a common issue that can be easily fixed. First, check if the fabric is properly pulled and secured to the frame. If it’s not, use a staple remover to release the fabric, and then carefully pull it tight and reattach it with a staple gun. Make sure to distribute the tension evenly across the fabric to avoid creating new wrinkles or bunching. If the wrinkles or bunching persist, try steaming the fabric using a handheld steamer or an iron set to a low heat. Gently steam the affected area, using your hands to smooth out the wrinkles as you go. Be careful not to apply too much heat or pressure, as this could damage the fabric. If all else fails, consider consulting a professional upholsterer for assistance.
Fixing Loose Or Wobbly Parts
A recliner with loose or wobbly parts can be a nuisance. To address this issue, start by locating the loose or wobbly component. It could be the armrest, footrest, or the backrest. Once you have identified the problematic area, you can use some simple troubleshooting techniques to fix it. If it’s a loose screw or bolt, tighten it using a screwdriver or a wrench. If the part is wobbly due to wear and tear, you may need to replace it with a new one. Ensure you have the correct replacement part by checking the recliner’s warranty or consulting the manufacturer. When replacing parts, follow the manufacturer’s instructions carefully to ensure a proper fit. If you’re unsure or uncomfortable with making repairs yourself, it’s best to seek professional assistance to avoid further damage to your recliner.
Troubleshooting Tips Summary:
To summarize, troubleshooting issues that arise when reupholstering a recliner can be an important step in achieving the desired outcome. If you encounter wrinkles or bunching in the fabric, make sure it’s pulled and attached evenly to the frame, and try steaming the area to smooth out the wrinkles. In the case of loose or wobbly parts, tighten any loose screws or bolts, and consider replacing worn-out components if necessary. Remember, when in doubt, it’s always wise to consult a professional for assistance to ensure the longevity and functionality of your newly reupholstered recliner.

Credit: www.doityourselfdivas.com
Frequently Asked Questions
Is It Possible To Reupholster A Recliner?
Yes, it is possible to reupholster a recliner to update its look and extend its lifespan. You can choose new fabrics and padding to give your recliner a fresh appearance and improve comfort. Hiring a professional upholsterer or doing it yourself are both viable options.
What Is The Average Cost To Reupholster A Recliner?
The average cost to reupholster a recliner is typically between $300 and $600. Prices may vary depending on factors such as size, fabric choice, and labor fees. It is recommended to consult with a professional upholstery service for an accurate quote.
How To Refurbish Recliner Chairs?
To refurbish recliner chairs, begin by removing any existing upholstery and cushions. Clean and repair the frame and springs as needed. Apply new padding and fabric, ensuring a secure and smooth fit. Finally, reattach any necessary hardware and accessories.
Can I Reupholster Over Existing Fabric?
Yes, you can reupholster over existing fabric to give your furniture a fresh look.
Read Next:
Conclusion
Reviving an old recliner is a rewarding DIY project that offers a mix of creativity and practicality. By following the step-by-step guide, you can transform your worn-out recliner into a stylish and comfortable piece of furniture. With a little patience and skill, reupholstering a recliner can breathe new life into your living space.