
Attaching grommets to fabric is a versatile technique that enhances the durability and aesthetics of your projects. Grommets are commonly used to reinforce holes through which cords, laces, or materials can pass, making them ideal for clothing, bags, curtains, and more.
This comprehensive guide offers step-by-step instructions for two methods: one with adhesive for a secure bond, and another without adhesive for a traditional approach.
Whether you choose to use glue or rely on non-adhesive techniques, mastering the art of attaching grommets will elevate your crafting endeavors, resulting in professional-looking and resilient fabric creations.
Table of Contents
What Is Grommet?
A grommet is a small, typically metal or plastic ring that is used to reinforce a hole or provide a neat and durable opening in fabric, leather, or other materials. Grommets serve several purposes, including preventing fraying of the material around the hole, strengthening the hole to withstand stress and friction, and providing a clean and organized way to pass cords, laces, or other items through the hole.

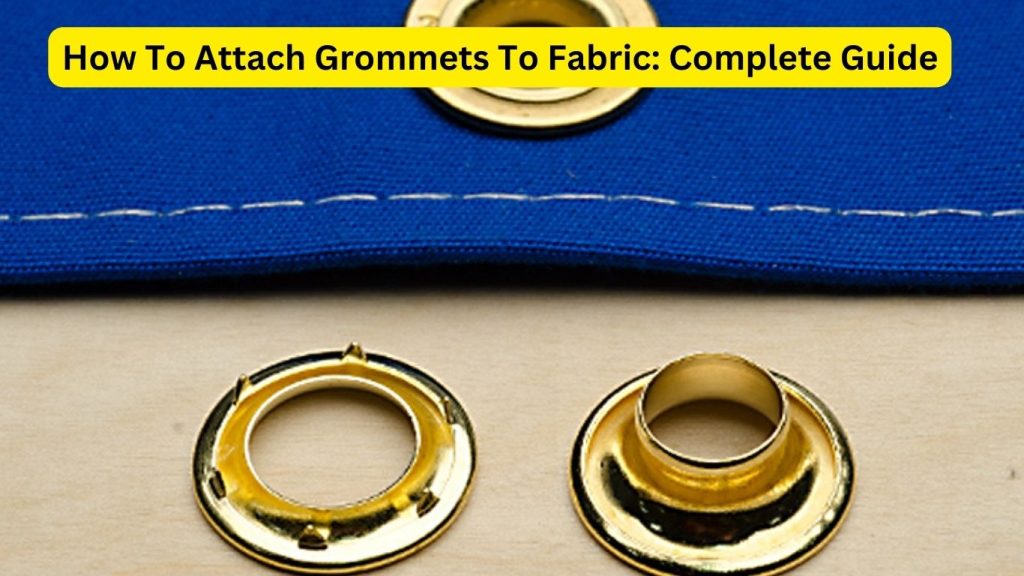
Grommets consist of two parts: an eyelet or washer and a grommet or eyelet ring. The eyelet is usually placed on the front side of the material, while the grommet is placed on the backside. The two parts are pressed together, sandwiching the material in between, to secure the grommet in place.
Grommets are commonly used in a variety of applications such as clothing (for drawstrings or laces), bags (for handles and straps), curtains (for curtain rods), banners (for hanging), and more. They come in various sizes, materials (metal, plastic, brass, etc.), and styles to suit different projects and design preferences.
How To Attach Grommets To Fabric: 2 Ways & Step By Step
Attaching grommets to fabric is a common technique used to reinforce holes and create a neat and durable way to pass cords, laces, or other materials through the fabric. Grommets come in various sizes and materials, and they can be attached to fabric using both adhesive (glue) and non-adhesive (no glue) methods. Here are step-by-step instructions for both methods:
Method 1: Attaching Grommets to Fabric with Glue
Materials Needed:
- Fabric
- Grommet kit (includes grommets, grommet setter, and anvil)
- Fabric glue or adhesive (appropriate for fabric)
Steps:
- Prepare the Fabric:
- Lay the fabric flat and mark the spot where you want to attach the grommet. Make sure the fabric is folded if needed, so you’re working on a single layer.
- Cut the Hole:
- Using a hole punch or a grommet cutter tool from the kit, cut a hole at the marked spot. The hole should match the size of the grommet’s inner diameter.
- Insert the Grommet:
- Place the grommet’s two parts on each side of the fabric hole, with the decorative side facing up.
- Apply Adhesive:
- Apply fabric glue or adhesive around the edges of the fabric hole. Make sure you don’t put too much glue that it oozes out when you press the grommet down.
- Set the Grommet:
- Take the grommet setter from the kit and place it on top of the grommet’s front (decorative) side. Use a hammer or mallet to gently tap the setter until the grommet is securely pressed together and the back side of the grommet flattens against the fabric.
- Let It Dry:
- Allow the adhesive to dry completely according to the manufacturer’s instructions before using the grommet.
Method 2: Attaching Grommets to Fabric Without Glue
Materials Needed:
- Fabric
- Grommet kit (includes grommets, grommet setter, and anvil)
- Hammer or mallet
- Cutting mat or scrap wood (to protect surfaces)
Steps:
- Prepare the Fabric:
- Similar to the glue method, mark the spot where you want to attach the grommet and fold the fabric if needed.
- Cut the Hole:
- Use a hole punch or grommet cutter tool from the kit to cut a hole at the marked spot, matching the grommet’s inner diameter.
- Insert the Grommet:
- Place the grommet parts on each side of the fabric hole, the decorative side facing up.
- Set the Grommet:
- Place the anvil from the kit on a solid surface. Place the fabric with the grommet on top of the anvil, ensuring that the grommet is aligned with the hole on the anvil.
- Take the grommet setter and position it over the grommet’s front side. Use a hammer or mallet to strike the setter firmly and evenly until the grommet is pressed together and secure. Repeat on the backside.
- Check and Finish:
- Carefully check both sides of the fabric to ensure the grommet is properly attached and the fabric isn’t damaged.
Both methods will result in a securely attached grommet. The choice between using adhesive or not depends on your preference and the specific project you’re working on. Always follow the manufacturer’s instructions for the grommet kit and adhesive for the best results.
Read Next:
Final Words
Mastering the art of attaching grommets to fabric opens up a world of creative possibilities. Whether you opt for the adhesive method for quick and secure bonding or the traditional non-adhesive approach for a classic touch, the result is the same: enhanced durability and aesthetic appeal.
By following the steps outlined in this guide, you can confidently incorporate grommets into your sewing and crafting projects, adding a professional and polished finish.
From clothing to accessories, curtains to bags, the versatility of grommets ensures that your fabric creations not only look impressive but also stand the test of time.